Taking a screenshot on a PC is easy, and several methods depend on your needs. Here are the most common ways:
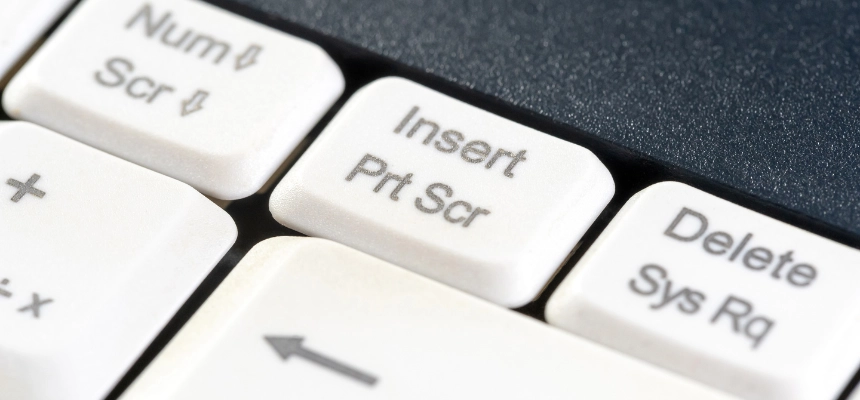
Print Screen Key Usage
The Print Screen key serves as a quick and versatile method to capture what is displayed on your monitor. Here are some examples that demonstrate how to use the PrtScn key in different circumstances:
Basic Full Screen Capture
Capture and Copy to Clipboard:
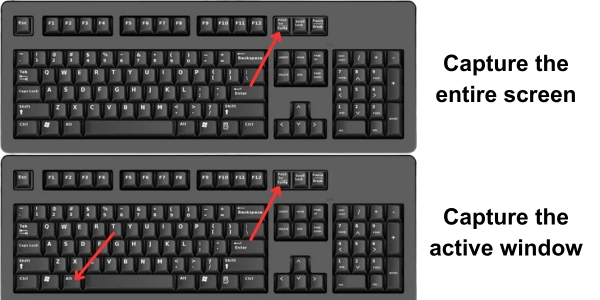
- Just press the PrtScn key. This will capture everything displayed on the monitor and copy the image into your clipboard.
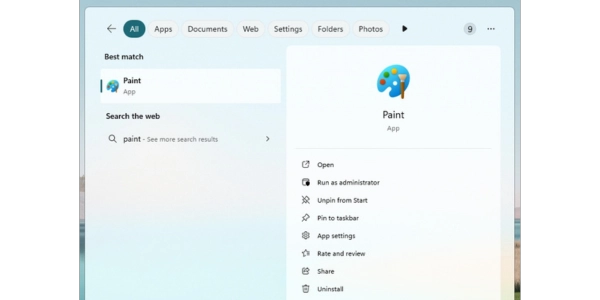
- Open an image editing tool like Paint or Microsoft Word.
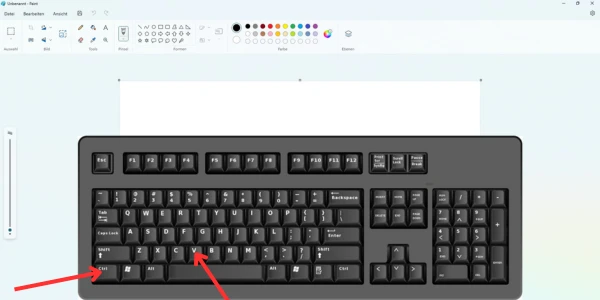
- Press Ctrl + V to paste the screenshot, then save or edit as needed.
Active Window Capture
Capture Only the Active Window:
- Bring the window you want to capture to the foreground.
- Press Alt + PrtScn. This captures only the active window and copies it to the clipboard.
- Paste this into your preferred image editor and save the file.
Capture and Save Automatically
Save Screenshot Directly:
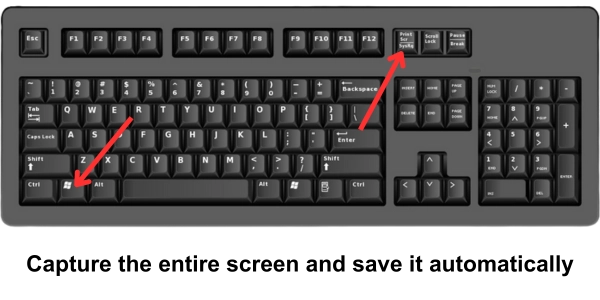
- Press Windows key + PrtScn. Your screen will dim briefly to indicate a successful capture.
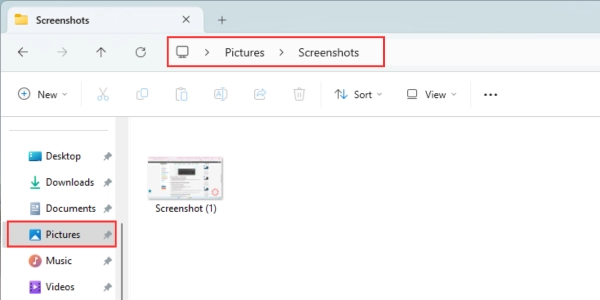
- The screenshot is automatically saved in the Screenshots folder within the Pictures library. This method is ideal for users who need to take multiple screenshots in a quick session, as it streamlines the saving process.
Advanced Tips
- Multiple Screens: If you have multiple monitors, pressing PrtScn captures all screens in one extended image.
- Clipboard History: Press Windows key + V to view your clipboard history, where you can access recent screenshots if you have multiple captures to manage.
Snipping Tool and Snip & Sketch
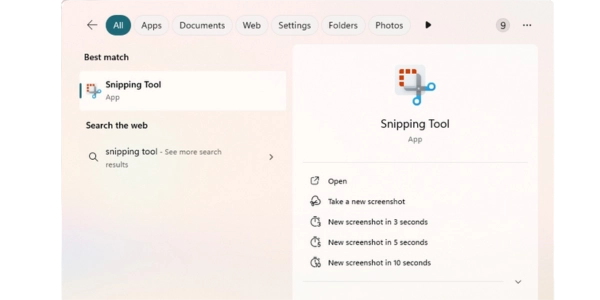
- Snipping Tool (older versions of Windows):
- Open the Snipping Tool from the Start menu.
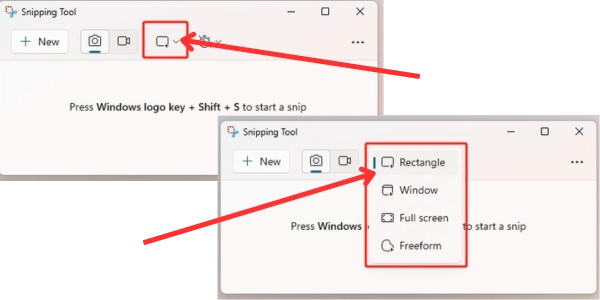
- Choose a snip type (Free-form, Rectangular, Window, or Full-screen).
- Capture the desired area and save the screenshot.
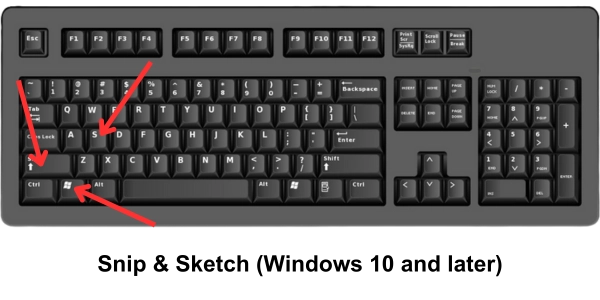
- Snip & Sketch (Windows 10 and later):
- Press
Windows key + Shift + S. - The screen will dim, and you can select the area you want to capture (Rectangular, Free-form, Window, or Full-screen).
- The screenshot is copied to the clipboard, and a notification will appear allowing you to save or edit it.
- Press
Using Game Bar (for gaming and apps)
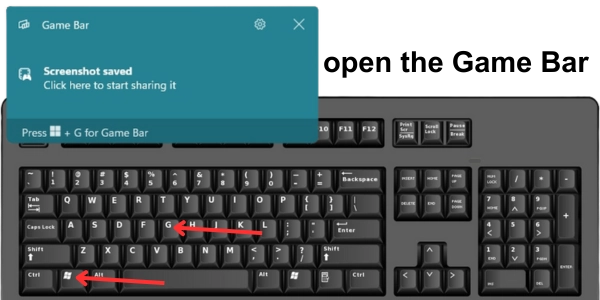
- Capture screenshots during gameplay or app use:
- Press
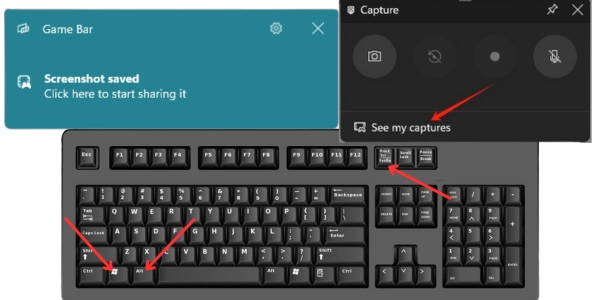
Windows key + Gto open the Game Bar. - Click on the camera icon or press
Windows key + Alt + PrtScnto capture a screenshot.
- Press
Device-Specific Screenshot Methods
For Microsoft Surface and Similar Devices: Capturing screenshots on devices like the Microsoft Surface can vary slightly depending on the model:
- Power + Volume Up: Quickly press and hold the Power button and the Volume Up button simultaneously. This captures the entire screen and automatically saves the image to the Screenshots folder within the Pictures directory.
- Windows logo + Volume Down: On certain older models, use this combination to achieve the same result.
Using Third-Party Tools
If you find the built-in screenshot tools too limiting and want to take the screenshotting game to the next level, here are a few handy third-party alternatives.
Greenshot
- Web Page Capture: Specializes in capturing a complete scrolling web page.
- Annotating: Offers tools for adding notes and highlights to screenshots.
- Editing Capabilities: Provides simple yet effective editing options to refine captured images.
Lightshot
- Quick Capture and Edit: Allows for rapid screenshot capture and immediate editing.
- Annotating: Easy-to-use annotating tools directly in the capture interface.
- Social Sharing: Enables users to quickly share their screenshots on various social media platforms.
ScreenRec
- Instant Sharing: Automatically generates a link for sharing screenshots and videos as soon as they are captured.
- Secure Cloud Storage: Ensures that all captures are securely stored online and easily accessible.
- Simple Video Capture: Allows for the recording of video clips with audio, useful for tutorials or presentations.
Screencast-O-Matic
- Video Recording and Editing: Not just screenshots—also records videos with a robust web-based video editor.
- Interactive Videos: Enhances educational and instructional videos with interactive elements like quizzes.
- Direct Uploads: Supports uploading content directly to platforms like YouTube, facilitating easy distribution.
Snagit
- Advanced Capturing: Capable of creating animated GIFs from screen recordings and capturing scrolling web pages.
- Comprehensive Editing Suite: Extensive annotating and editing capabilities for both images and videos.
- Versatile Output Options: Offers a variety of formats for saving and sharing, including direct integration with cloud services.
These third-party applications enhance the functionality of traditional screenshot tools by offering advanced features such as annotating, editing, and sharing capabilities. They cater to a range of needs from simple image capture to comprehensive video editing and social sharing, making them invaluable for users who require more than just basic screen capture functionality.
Understanding Screenshots
The Fundamentals Across Devices: A screenshot is a digital snapshot of your current screen display, useful for recording evidence, saving information, or sharing screen content:
- On PCs: Use the previously mentioned methods to capture, edit, and manage screenshots.
- On Mobile Devices: Typically, press Power + Volume Down (varies by device) to capture. Screenshots are saved in the device’s photo gallery, where they can be accessed for further actions like sharing or editing.
Read More: How to Take a Screenshot on a Mac?


