
QUICK ANSWER: To enter BIOS, restart your PC and repeatedly press the manufacturer’s hotkey (e.g., F2 or Delete) before Windows loads. Alternatively, use Windows Settings: navigate to Recovery, select Advanced Startup, then choose UEFI Firmware Settings. Always Save and Exit (F10) to apply your hardware configuration changes.
UEFI, which is the new name for BIOS, is the first program your PC runs when you press the power button. You should only touch it when you have to, like when you need to change the boot order to install Windows from a USB drive, turn on Secure Boot, or enable TPM 2.0 for a Windows 11 upgrade. It might sound hard, but it is really not that hard if you know where to look.
What Is UEFI and BIOS?
Basic Input/Output System is what ‘BIOS’ stands for. It is the low-level firmware on your motherboard that turns on your hardware before the OS does. As the manager who checks that your RAM, storage drives, and CPU are all present and correct before Windows takes over, this is what you can think of it as.
UEFI, which stands for “Unified Extensible Firmware Interface”, is the new BIOS. BIOS is no longer used on most PCs made after 2012; however, some people still call it “BIOS” out of habit. For you, the main difference is that UEFI usually has a better interface, lets you use the mouse to move around, and is much better at handling large storage drives. They are the same way to get to “BIOS” and “UEFI” for this guide.
According to PCMag’s guide on how to enter BIOS, UEFI has pretty much replaced legacy BIOS on all new hardware. The name stuck, though, because UEFI is still the way to get to your PC’s core hardware settings.
Why People Change BIOS Settings Most of the Time
Changing the Order of the Boots
This is the main reason why people go to BIOS. If you want to install Windows from a USB drive, your PC needs to start up from the USB drive instead of the hard drive inside. That is what the BIOS boot order setting controls. You can set USB drives, optical drives, or network adapters to take priority over your main storage.
Enabling TPM 2.0 for Windows 11
For Windows 11, you need a Trusted Platform Module (TPM) version 2.0. In a lot of PCs, TPM is on the motherboard but turned off by default in the BIOS. If the Windows 11 upgrade check keeps failing, you can usually fix it by going into the BIOS and turning on TPM. It could say “TPM”, “PTT” (Intel Platform Trust Technology), or “fTPM” (AMD firmware TPM) depending on the brand of your motherboard.
Turning Secure Boot On or Off
UEFI’s Secure Boot feature stops unauthorised software from loading when the computer first starts up. You have to turn it on for Windows 11 to work. You may need to temporarily turn it off, though, if you are dual-booting Linux or installing an older OS. It is easy to change either the BIOS security or the boot menu.
Speeding Up Your RAM (XMP/EXPO)
You may have bought fast DDR5 RAM, but your computer is only using the base speed. This is because you need to manually turn on the XMP (Intel) or EXPO (AMD) profiles in the BIOS. This is the safest and most common way to overclock. It tells your RAM to run at the speed it was made for and was sold for.
Looking at Hardware Details
The BIOS shows you the temperature of your CPU, the speed of your fans, and the names of your hardware in real time. If you just put in new RAM and want to make sure the system sees it, or if you want to make sure your CPU is running at the right temperature, you should check the BIOS hardware monitor.
How to Enter BIOS on a Windows PC
Method 1: Press the BIOS Key at Startup
This is the usual way to do things. When you press the power button, your PC shows a splash screen for a short time before Windows starts to load. During that window, which lasts only a second or two, you need to press the right key to get into BIOS.
Different brands use different keys. Here is a quick reference — and as soon as the PC turns on, start pressing your key repeatedly straight away. Do not wait for the Windows logo, or you will miss the window.
| Manufacturer | BIOS Key |
| ASUS | F2 or Delete |
| Dell | F2 |
| HP | F10 or Esc |
| Lenovo | F1 or F2 |
| MSI | Delete |
| Acer | F2 or Delete |
| Samsung | F2 |
| GEEKOM Mini PCs | Delete or F2 |
If you miss the window and Windows starts to load, just restart and try again.
Method 2: Use Windows Settings to Get to the BIOS
If your PC starts up too quickly to catch the startup key (this happens a lot with new SSDs), Windows gives you a safe way to get back on track. Windows 10 and Windows 11 can both use this method.
- To get to System, open Settings and then go to Recovery.
- Press the Restart now button under “Advanced startup”.
- After restarting, your PC will show a blue recovery menu. Click on Troubleshoot.
- Choose Advanced options.
- Click on UEFI Firmware Settings.
- Press Restart. The PC will start up right into the BIOS.
This method works much better on systems that boot quickly and do not need any split-second timing.
What to Do If You Can’t Enter BIOS
There are a few things you should check if neither method works. First, if you are using a USB keyboard, try a PS/2 keyboard or a different USB port. This is because some motherboards do not turn on all USB ports before the BIOS key window. Second, if Fast Boot is enabled in your BIOS settings, it might not display the startup key window at all. The Windows Settings method above completely gets around this. Third, the BIOS key on some laptops is a function key combination (like Fn + F2) instead of a separate key. If you are not sure, look at your laptop’s manual or the support page for the manufacturer.
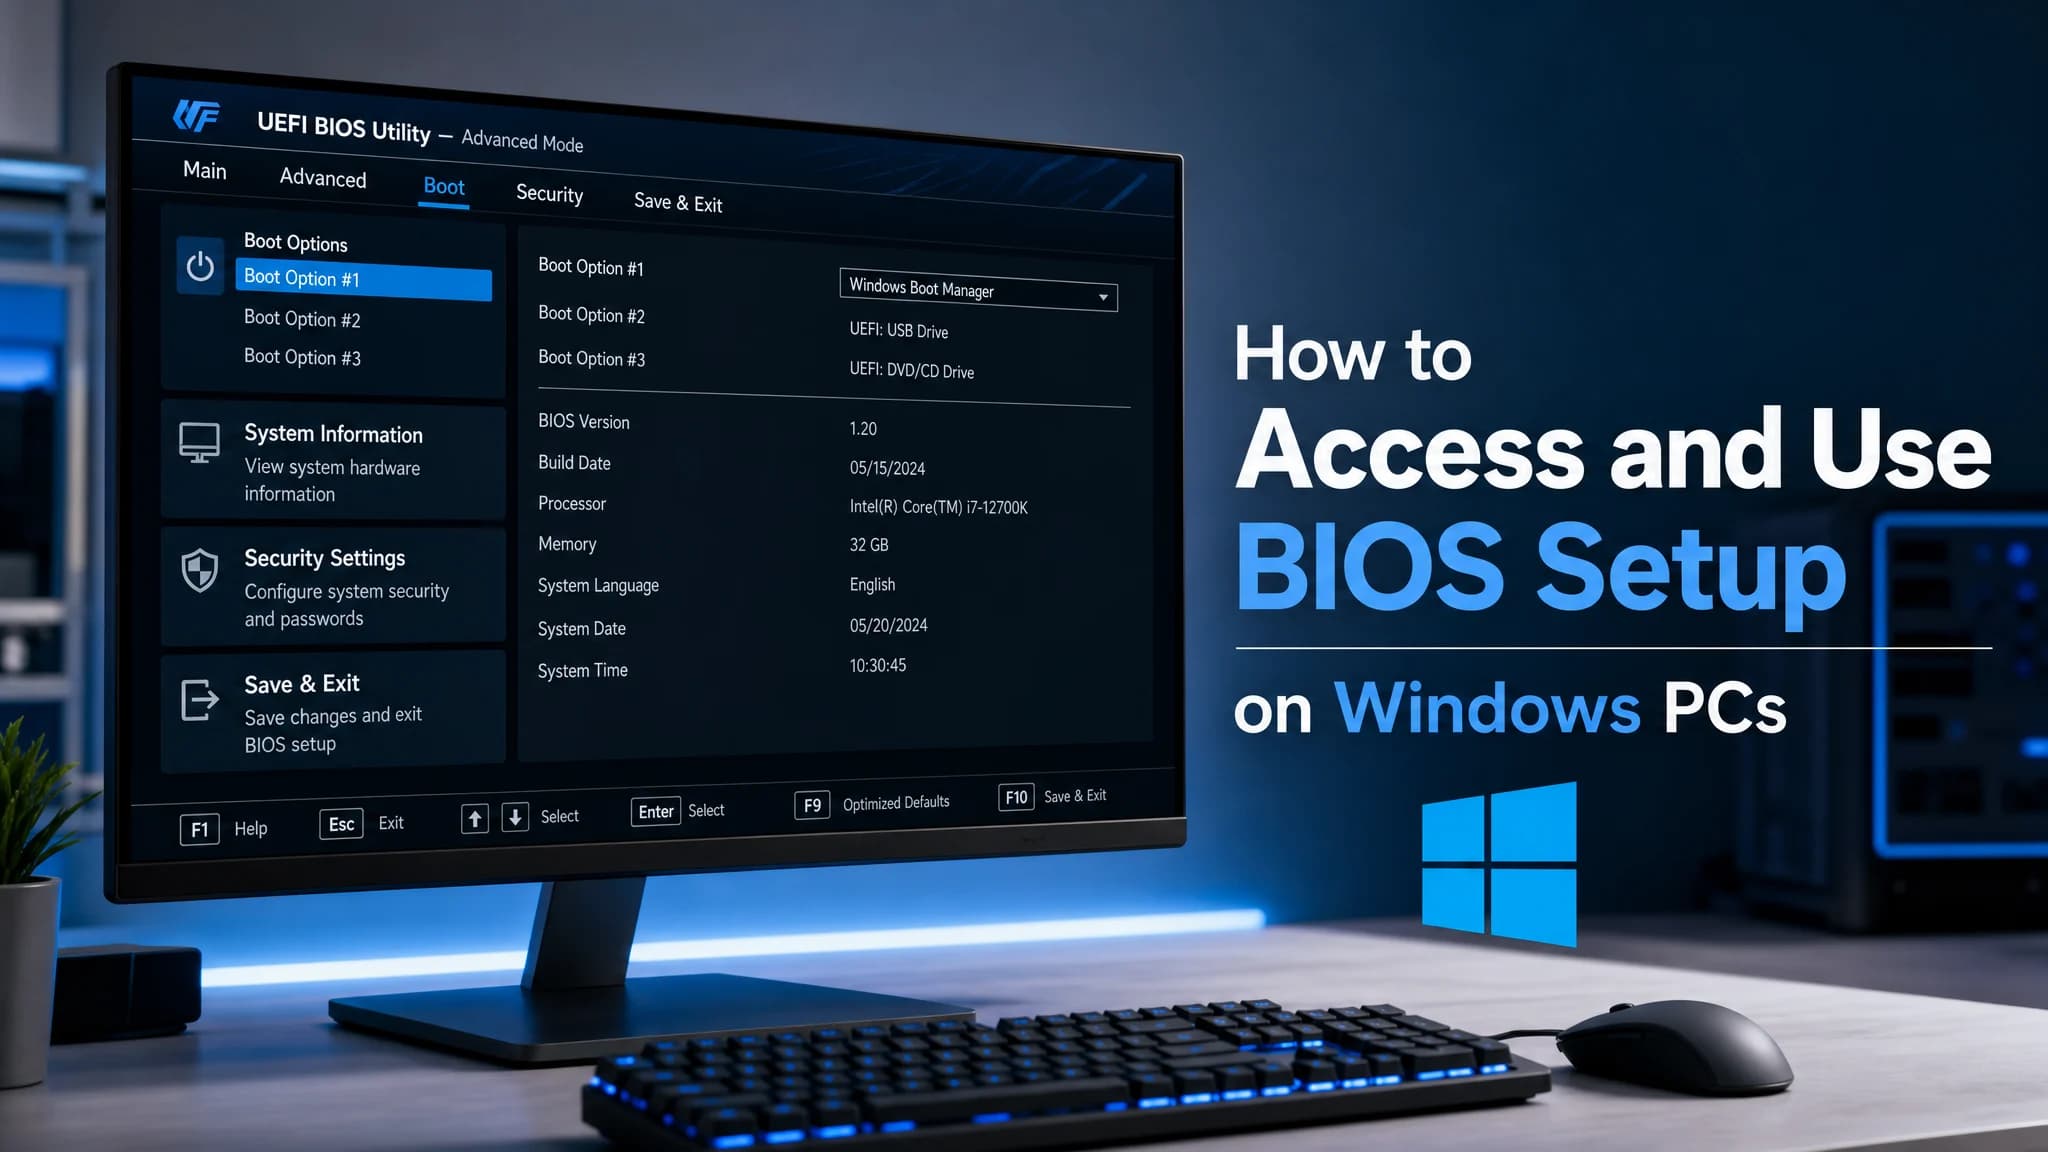
How to Navigate BIOS Setup
No matter what brand of motherboard you have, the layout in the BIOS will be different, but the logic will always be the same. Older BIOS interfaces are text-only, and you have to use the arrow keys, Enter to select, and Escape to return to the previous screen. These days, UEFI interfaces look more like real programs and usually let you use the mouse.
Most of the time, the main parts you will see are:
- Main / Info: Shows the date, time, and hardware summary for your system.
- Advanced / AI Tweaker: CPU settings, memory profiles (XMP/EXPO), and virtualisation options.
- Boot: The order of boots, the Fast Boot toggle, and the Secure Boot settings.
- Security: TPM settings, administrator passwords, and managing Secure Boot.
- Monitor / Hardware Monitor: Check the CPU temperature, fan speeds, and voltage readings in real time.
Be careful: only change settings that you know how to use. You can change hardware parameters directly from the BIOS. If you change the voltage or frequency setting to something else, it could make the computer unstable. You should only use the menus that let you change the boot order or turn on TPM. Do not touch anything else.
Related Article: How to Update the BIOS for Windows 11 Operating System
How to Save and Exit BIOS
You need to save your changes before you close the program. If you don’t, your PC will restart with the default settings. If you look for an “Exit” tab or use a keyboard shortcut, you can find the following options in most BIOS interfaces:
- Save Changes and Exit (or F10 on most systems): This saves all of your changes and starts your computer back up. Most of the time, this is what you want.
- Discard Changes and Exit: Leave BIOS without saving anything. If you messed up and want to start over, use this.
- Load Optimised Defaults: This sets all of the BIOS settings back to the way the manufacturer recommends they be. This is helpful if your system acts funny after you change the BIOS.
Your PC will restart normally after you click “Save Changes and Exit”, and your new settings will remain in place.
FAQs about BIOS Setup
Can Changing BIOS Settings Damage My PC?
No, not for the common tasks this guide talks about, like boot order, TPM, Secure Boot, and XMP. You can change these settings back to their original state. There is only a risk if you change CPU voltages or clock speeds by hand beyond what is safe, but that is a whole different subject. Leave a setting alone or load the optimised defaults if you are not sure what it does.
What Happens If I Exit BIOS Without Saving?
There is no change. After you exit BIOS, your PC starts up the same way it did before. This is a good safety net; if you change something by accident and do not know what it is, you can just click “Discard Changes and Exit” to go back to the beginning.
How Do I Find Out Which BIOS Key My PC Uses?
The fastest way is to go to the support website for the manufacturer. Instead, look at the very first screen that comes up when you turn on your PC. Most systems show a short message at the bottom of the screen that says something like “Press DEL to enter Setup” or “F2: BIOS Setup”. If your PC starts up too quickly to read it, use the Windows Settings method described above instead.
Can I Access BIOS Without Restarting?
Not directly — BIOS runs before the OS does, so you have to restart every time you want to get to it. If you go to System > Recovery > Advanced Startup in Windows Settings, you can restart from Windows instead of doing a cold reboot, which is the closest thing you will get to a “soft” BIOS entry.
Final Thoughts
BIOS is one of those words that sounds a lot more complicated than it is. It is just a settings menu once you get inside, and it takes about two minutes to do simple things like changing the boot order, turning on TPM, or turning on XMP for your RAM. Make sure you know how to get in, what you need to change, and how to save your work before you leave.
If you want a PC that is easy to set up in BIOS—with clean UEFI interfaces, full TPM 2.0 support, and Windows 11 ready right out of the box—GEEKOM’s range of mini PCs is worth a look. They are built for everyday users who want reliable hardware without the hassle of a full desktop tower.


