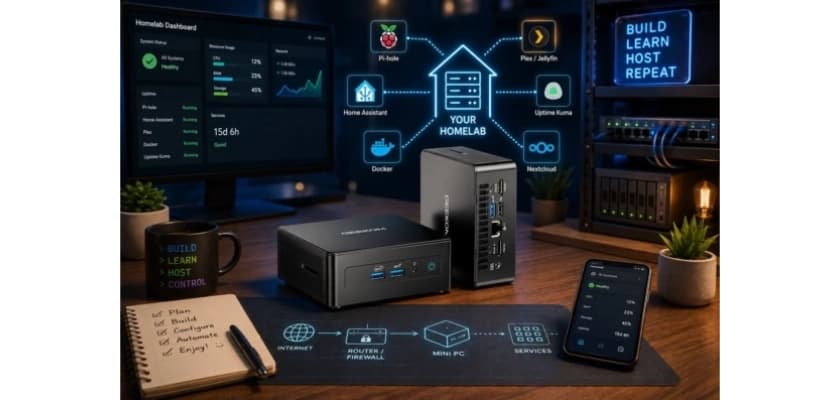
Building your first homelab is a must for anyone who wants to take charge of their digital life. A homelab is the perfect place to play if you are sick of paying monthly fees for cloud storage, want to block ads throughout your home, or just want to learn everything there is to know about Linux and networking. The good news? No longer do you need a big, noisy server rack to begin. These days, you can run dozens of business-level services right from your desk on a small, quiet PC that uses little power.
Key Takeaways
- Start Small: You don’t need to build a complex cluster on day one. A single mini PC running a few basic containers is the perfect starting point.
- The Mini PC Sweet Spot: They offer the ideal balance of low power consumption, silent operation, and enough processing grunt to handle virtualisation.
- Essential Hardware: Look for a modern multi-core CPU, at least 16GB of RAM (though 32GB is better), and fast NVMe storage.
- What You Can Run: From ad-blockers like Pi-hole to smart home hubs like Home Assistant and media servers like Plex, the possibilities are endless.
- Avoid Common Mistakes: Don’t expose services to the open internet without proper security, always take backups, and don’t allocate all your RAM to a single virtual machine.
What Is a Homelab (and Why Build One)?
A “homelab” is basically just a server (or a group of servers and networking gear) that you set up in your own home to test, learn, and host apps. A “homelab server” is the computer that does all the work. In the past, these were old enterprise servers rescued from IT departments at businesses. A homelab these days can be as simple as a mini PC sitting on a shelf.
But why make one? Within the homelab community in 2026, there are three main goals: privacy, saving money, and learning. Your files and passwords stay on your hardware when you host your own file sync service or password manager. You can depend much less on paid cloud services if you run your own media server (like Jellyfin or Plex) and photo backup service (like Imich). Another great way to improve your IT or software development skills is to build your own systems. This is the best way to learn Linux, Docker, and networking. It is a sandbox where you can make mistakes as long as you have copies of your work.
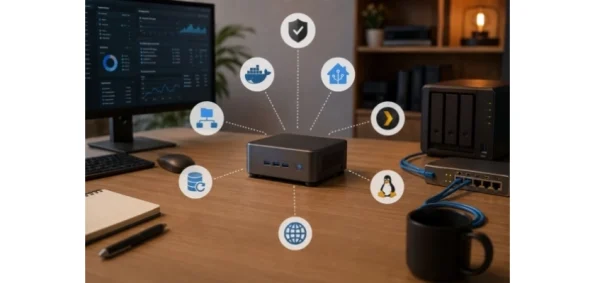
Why a Mini PC Is the Homelab Sweet Spot
You can start with one of four types of hardware: a Raspberry Pi, an old office PC, a used enterprise server, or a new mini PC. Take a look at why the mini PC has become the king of the modern homelab.
Mini PC vs. Raspberry Pi: For easy projects, the Raspberry Pi works great. But its ARM architecture and small amount of RAM make it hard to run Proxmox and many virtual machines (VMs). An x86 mini PC offers much better performance and supports more programmes.
Mini PC vs. Old Office PC: Although used towers are cheap, they are big, loud, and use a lot of power (40W to 60W just sitting there). An average modern mini PC uses about 10W when it is not working. The mini PC will quickly pay for itself in Australia just by saving electricity.
Mini PC vs. Enterprise Server: Used rackmount servers have a lot of power, but they sound like jet engines and make a lot of heat. They are not useful for a home office unless you have a garage that is soundproof.
The mini PC hits the absolute sweet spot. It is small enough to hide behind a monitor, uses only a few watts of power when not in use, and supports x86 architecture and virtualisation.
What to Look for in a Mini PC for a Homelab
Not every mini PC is the same. You should look at more than just the processor speed when buying a homelab server. Here is a list of things you should buy:
- CPU and Virtualisation Support: You need a modern processor with multiple cores. To run Proxmox efficiently, it is important to make sure it supports hardware virtualisation, like Intel VT-x or AMD-V.
- RAM (Memory): 16GB is the very least you should have, but 32GB or 64GB is ideal. VMs need a lot of memory. Make sure the mini PC can easily get more RAM.
- Storage (NVMe SSD): Your OS and VM discs need fast NVMe storage. Having two NVMe slots is great for backup or caching.
- Networking (2.5GbE): Gigabit ethernet is fine, but 2.5GbE is ideal for moving large media files or running a local NAS.
- Ports and Connectivity: For external drives, Zigbee dongles, or AI accelerators, you need more than one USB port (USB 3.2 or USB4).
- BIOS Features: Check that the BIOS supports “Auto Power-On” and “headless boot” so that you can use the computer without a monitor.
If you’re unsure where to start, check out the best mini PCs for a homelab to see models specifically tailored for these workloads.
What Else You Need
Storage: SSD, NVMe and NAS Options
Even though your mini PC has fast NVMe storage for apps, you will probably need more space for movies or backups. Direct Attached Storage, or DAS, lets you connect large external USB hard drives straight to the mini PC. Your mini PC can also work with a separate Network Attached Storage (NAS) device. A lot of people who do homelabs start with external drives and move on to a dedicated NAS as their storage needs increase.
Networking & VLANs
A regular home router will work at first, but as your homelab grows, Virtual Local Area Networks (VLANs) will give you more control over your network traffic. With VLANs, you can divide your network into logical groups. There are three VLANs: one for personal laptops, one for homelab servers, and one for insecure IoT devices. This way, hackers can not get to personal files on insecure IoT devices. A managed switch and a capable router are needed to set this up.
The Software Stack: Proxmox, Docker and the OS
Software is just as important as hardware when it comes to buying electronics. The Proxmox Virtual Environment (VE) is the most popular base for a modern homelab. “Type-1 Hypervisor” is what Proxmox is. You do not need to install Windows and then run a virtual machine programme on top of it; instead, you install Proxmox right on your mini PC’s hardware. Then, Proxmox lets you use a web browser to set up and manage dozens of separate Virtual Machines (VMs) and light Linux Containers (LXC).
You will usually use Docker and a Linux operating system like Debian or Ubuntu inside these VMs or containers. Docker is a platform for containerisation that sets up a single unit that contains an application and all of its dependencies. Running one command is all it takes to set up complicated software like a media server.
How to Build Your Mini PC Homelab, Step by Step
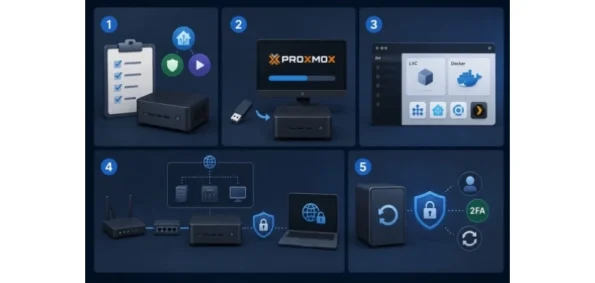
Step 1: Plan Your Goals and Budget
Before you buy hardware, make sure you know what you want to do. Do you only want to run Home Assistant and block ads? For a small home server, a cheap mini PC with 16GB of RAM works great. You will need an Intel Core i7 or Ryzen 7 processor with at least 32GB of RAM and the ability to support Quick Sync Video. Make a plan for your service first.
Step 2: Install a Hypervisor (Proxmox VE)
To flash the Proxmox VE ISO onto a USB drive, get it from their website and use a tool like Rufus or BalenaEtcher. Connect the USB to your mini PC, boot from it, and then follow the on-screen instructions to install. When you set up the mini PC, you will need to give it a static IP address. After setting up the server, you can unplug the monitor and keyboard. From now on, you will use a web browser on your main computer to control the server.
Step 3: Run Your First Services with Docker / LXC
Use the web interface for Proxmox to make a lightweight Linux Container (LXC) that runs Debian or Ubuntu. To make your “Docker Host,” install Docker and Docker Compose inside this container. You can start pulling Docker images and setting up your services right away from here. You can define your whole setup in code when you use Docker Compose files. This makes backups and restores very easy.
Step 4: Set Up Your Network, VLANs and Remote Access
You will want to use a safe way to access your services once they are up and running. Your mini PC and core VMs should have static IP addresses set up so that they do not change when your router restarts. Do more than just open ports on your router if you want to get in from outside. Set up a safe VPN like WireGuard or an overlay network like Tailscale, on the other hand. This lets you connect to your services securely from anywhere.
Step 5: Add Backups and Basic Security
If you do not back up your homelab, disaster is just around the corner. Proxmox comes with a great native backup tool. You can set it to back up your VMs and containers every night to an external drive or NAS. For security, make sure that each service has its own strong password, turn on Two-Factor Authentication (2FA), and make sure that your Linux containers always have the latest security patches installed.
What to Run First (Beginner Project Ideas)
Sometimes it is scary to look at a blank Proxmox dashboard. If you are just starting, these five basic projects will help you right away and are great for beginners.
Pi-hole (Network-Wide Ad Blocking)
Pi-hole acts as a “black hole” for internet ads and trackers. By setting it as your network’s DNS server, it blocks ads across all devices—phones, smart TVs, and laptops—without needing individual browser extensions.
Media Server (Jellyfin / Plex)
Why pay for streaming subscriptions when you can build your own? Plex and Jellyfin organise your personal media into a beautiful interface. Jellyfin is particularly popular because it’s completely free and open-source.
Home Assistant (Smart-Home Hub)
If you use multiple smart home apps, Home Assistant is the ultimate solution. It acts as a central, local hub tying all your smart devices together. Because it runs locally, automations are instant, and your data stays private.
A Dashboard and Monitoring (e.g. Uptime Kuma)
Once services are running, you need to track them. Uptime Kuma constantly checks if your apps are online and sends alerts if they crash. Pair it with a dashboard like Homepage for a clean landing page linking to all your self-hosted apps.
A Lab for Learning (VMs, Containers, k3s)
Don’t forget the “lab” aspect. Spin up an isolated Ubuntu VM to practice Linux commands or try a lightweight Kubernetes cluster (k3s). If you break the VM, simply delete it and start fresh in seconds.
Levelling Up Your Homelab
The homelab rabbit hole goes as deep as you want it to go once you know the basics. Networking and storage are the next steps that make sense. You could buy a managed switch to improve VLAN segmentation and keep your private data separate from your web-facing services.
Most of the time, storage is the next big upgrade. You could make a dedicated NAS that runs TrueNAS Scale and uses ZFS to protect data at an enterprise level. You can then look into High Availability (HA) clustering. By adding a second or third mini PC to your Proxmox setup, you can set up your services to move to a different node automatically if one of the hardware units fails. This way, there will be no downtime. Lastly, a mature and strong homelab will have automated backups stored off-site (following the 3-2-1 backup rule).
Common Mini PC Homelab Mistakes to Avoid
Everyone makes mistakes when building their first server. Here are the most common pitfalls to avoid:
- Overcommitting RAM: You might want to give each virtual machine 8GB of RAM, but if your mini PC only has 32GB, you will run out of space quickly. Much better than full VMs, containers (LXC) share resources. To save RAM, use containers as much as possible.
- Installing Everything at Once: Do not try to set up Home Assistant, Plex, and a reverse proxy all at the same time. Start with one service, learn how it works, and make sure it is safe. Then move on to the next one.
- Not Setting Static IPs: If your server uses DHCP (dynamic IPs from your router), all of your services could lose their IP addresses if you restart your router. Set up static IP addresses for your server and core VMs as soon as possible.
- Skipping Snapshots: Taking a “Snapshot” in Proxmox before making a big change to the configuration or running a system update is a good idea. You can quickly go back to the snapshot that worked if the update breaks your service.
- Exposing Services Without Security: If you do not have to, never open ports on your router to let the internet see a service (like a dashboard). Use a Reverse Proxy (like Nginx Proxy Manager) and strict authentication if you have to.
- Ignoring the 3-2-1 Backup Rule: You are not backing up your data by putting it on a RAID array. The 3-2-1 rule says that you should have three copies of your data, two on different media, and one stored somewhere else.
FAQ
Is a mini PC good for a homelab?
Yes, most people agree that a mini PC is the best place to start for a modern homelab. Their low power use, quiet operation, and enough x86 processing power to run complex virtualisation software like Proxmox make them the perfect choice.
Is a mini PC better than a Raspberry Pi for a homelab?
For projects that are not simple one-task jobs, yes. A mini PC has standard x86 architecture, which means it works with all software, has a lot more RAM, and faster NVMe storage, which makes it much better for running multiple virtual machines and containers.
How much RAM do I need for a homelab?
Can I run Proxmox and Home Assistant on a mini PC?
Of course. The smart home community actually says that running Home Assistant as a Virtual Machine within Proxmox on a mini PC is one of the best ways to set it up because it is stable and easy to back up.
How much does it cost to build and run a homelab?
For $500 to $1000, you can get a mini PC with a lot of features. Electricity costs will range from $20 to $40 per year if you run it 24 hours a day, seven days a week, assuming you use the right hardware and your local energy rates.
Can I run a homelab in an apartment?
Yes! Mini PCs are great for apartments because they are quiet and do not make a lot of heat. You do not need a rack enclosure or a separate room for servers.
Is a homelab worth it in 2026?
More than ever. With the cost of cloud subscriptions going up and worries about data privacy growing, hosting your own services can save you a lot of money and give you peace of mind. It can also teach you a lot about technology.
Start Building Your Mini PC Homelab
Building a homelab is a process of always learning and tinkering. At first, you just want to block ads or host your own movies. But quickly, you become deeply interested in networking, Linux, and being independent. If you pick the right hardware base, you can avoid the noise and high power costs of older business equipment. A modern, well-built mini PC has all the processing power and virtualisation support you need to run a lot of services from your desk without making a sound. As you take back control of your digital infrastructure, start small and make backups often. Enjoy the process.